mysql-03 mysql 一主多从+主从复制+读写分离
概念引入
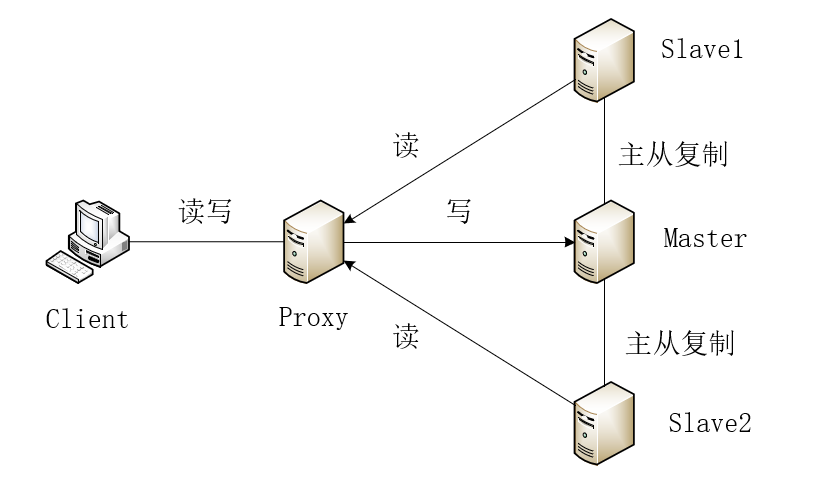
利用mysql主从复制技术,可以在保证主从数据库数据同步的前提下,实现读写分离。在master上完成写操作,在slave上完成读操作,可以分担master的压力,从而减少主数据库的连接,降低数据库崩溃、数据丢失等风险。mysql读写分离技术非常适用于读操作量比较大的场景,slave也可以设置多台,可大幅减轻master的压力。
常见mysql读写分离分类
一、基于程序代码内部实现
在代码中根据select 、insert进行路由分类,这类方法也是目前生产环境下应用最广泛的。优点是性能较好,因为程序在代码中实现,不需要增加额外的硬件开支,缺点是需要开发人员来实现,运维人员无从下手。
二、基于中间代理层实现
代理一般介于应用服务器和数据库服务器之间,代理数据库服务器接收到应用服务器的请求后根据判断后转发到,后端数据库,有以下代表性的应用程序。
1)mysql_proxy:mysql_proxy是Mysql的一个开源项目,通过其自带的lua脚本进行sql判断。(要求具有lua编程能力,严重依赖lua脚本,需要不停给mysql_proxy打补丁,修复一些缺陷,mysql官方并不建议将此程序在生产环境使用)。
2)Atlas:是由 Qihoo 360, Web平台部基础架构团队开发维护的一个基于MySQL协议的数据中间层项目。它是在mysql-proxy 0.8.2版本的基础上,对其进行了优化,增加了一些新的功能特性。360内部使用Atlas运行的mysql业务,每天承载的读写请求数达几十亿条。支持事物以及存储过程。
3)Amoeba:由阿里巴巴集团在职员工陈思儒使用序java语言进行开发,阿里巴巴集团将其用户生产环境下,但是它并不支持事物以及存数过程。(只需要针对xml配置文件配置即可,功能强大配置简单,无需依赖额外脚本)
4)Cobar:基于Amoeba上开发的,主要实现分库,这里不做详细介绍。
注意:一般来讲,当在程序代码中实现读写分离对代码的改动较大时,会选择是由中间代理层来实现读写分离。
实验准备
slave1:192.168.141.53/24
slave2:192.168.141.69/24
master:192.168.141.12/24
proxy:192.168.141.16/24
client:192.168.141.132/24
实现方法:基于中间代理层实现,使用mysql_proxy程序实现。
实验拓扑:
实验步骤
1、下载mysql_proxy
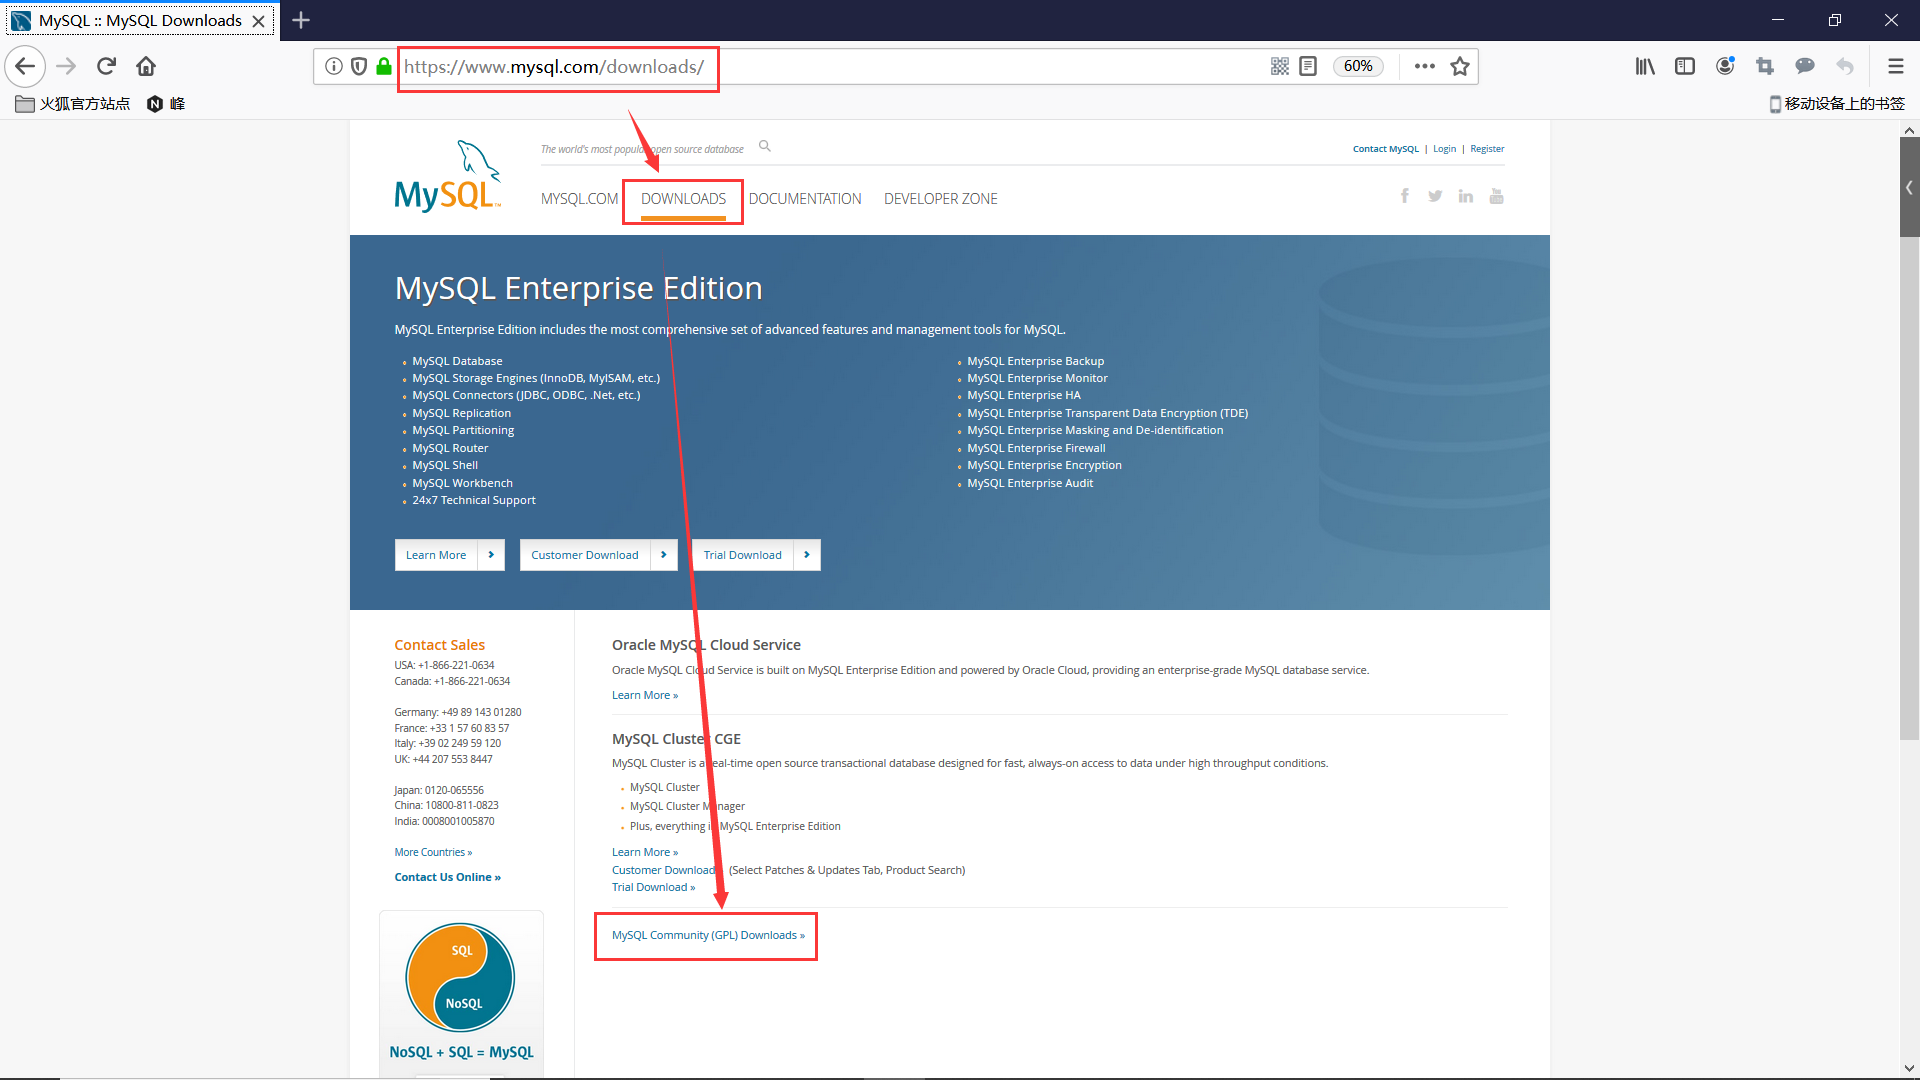
1)打开mysql官网www.mysql.com,找到download->MySQL Community (GPL) Downloads ,如下图
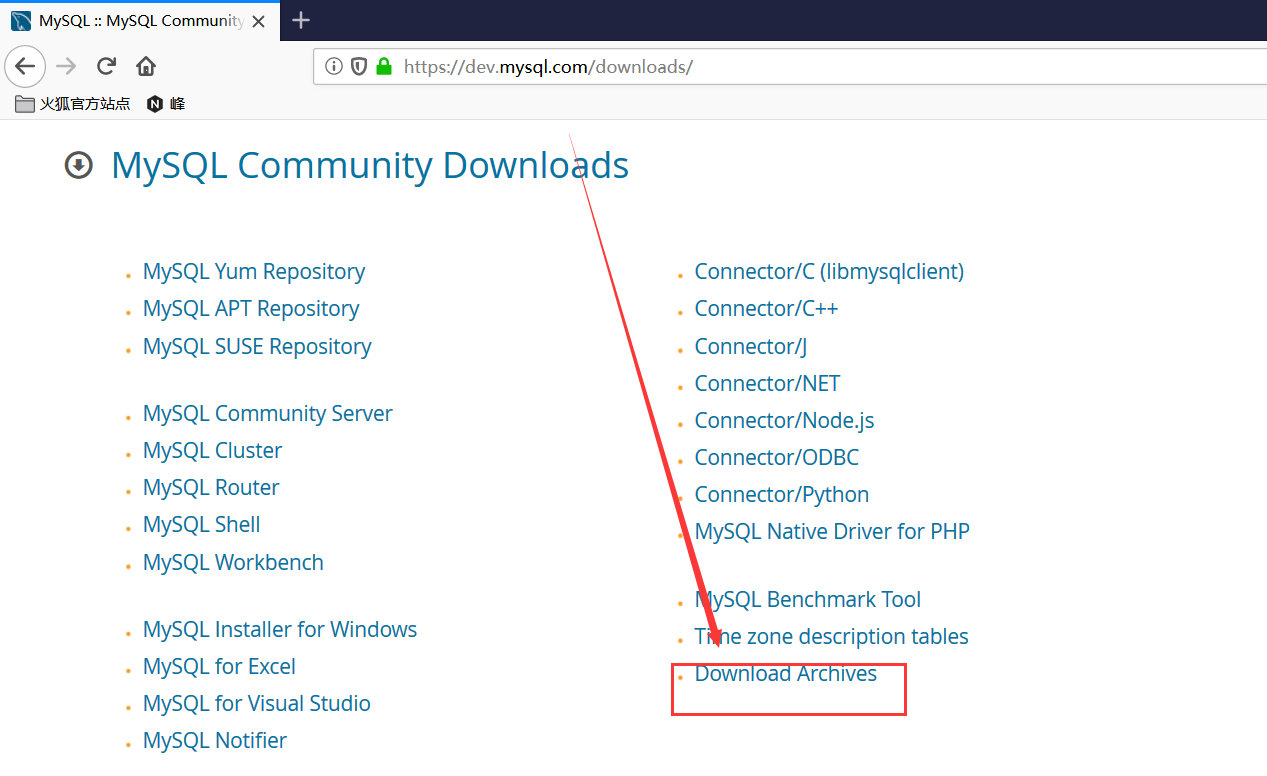
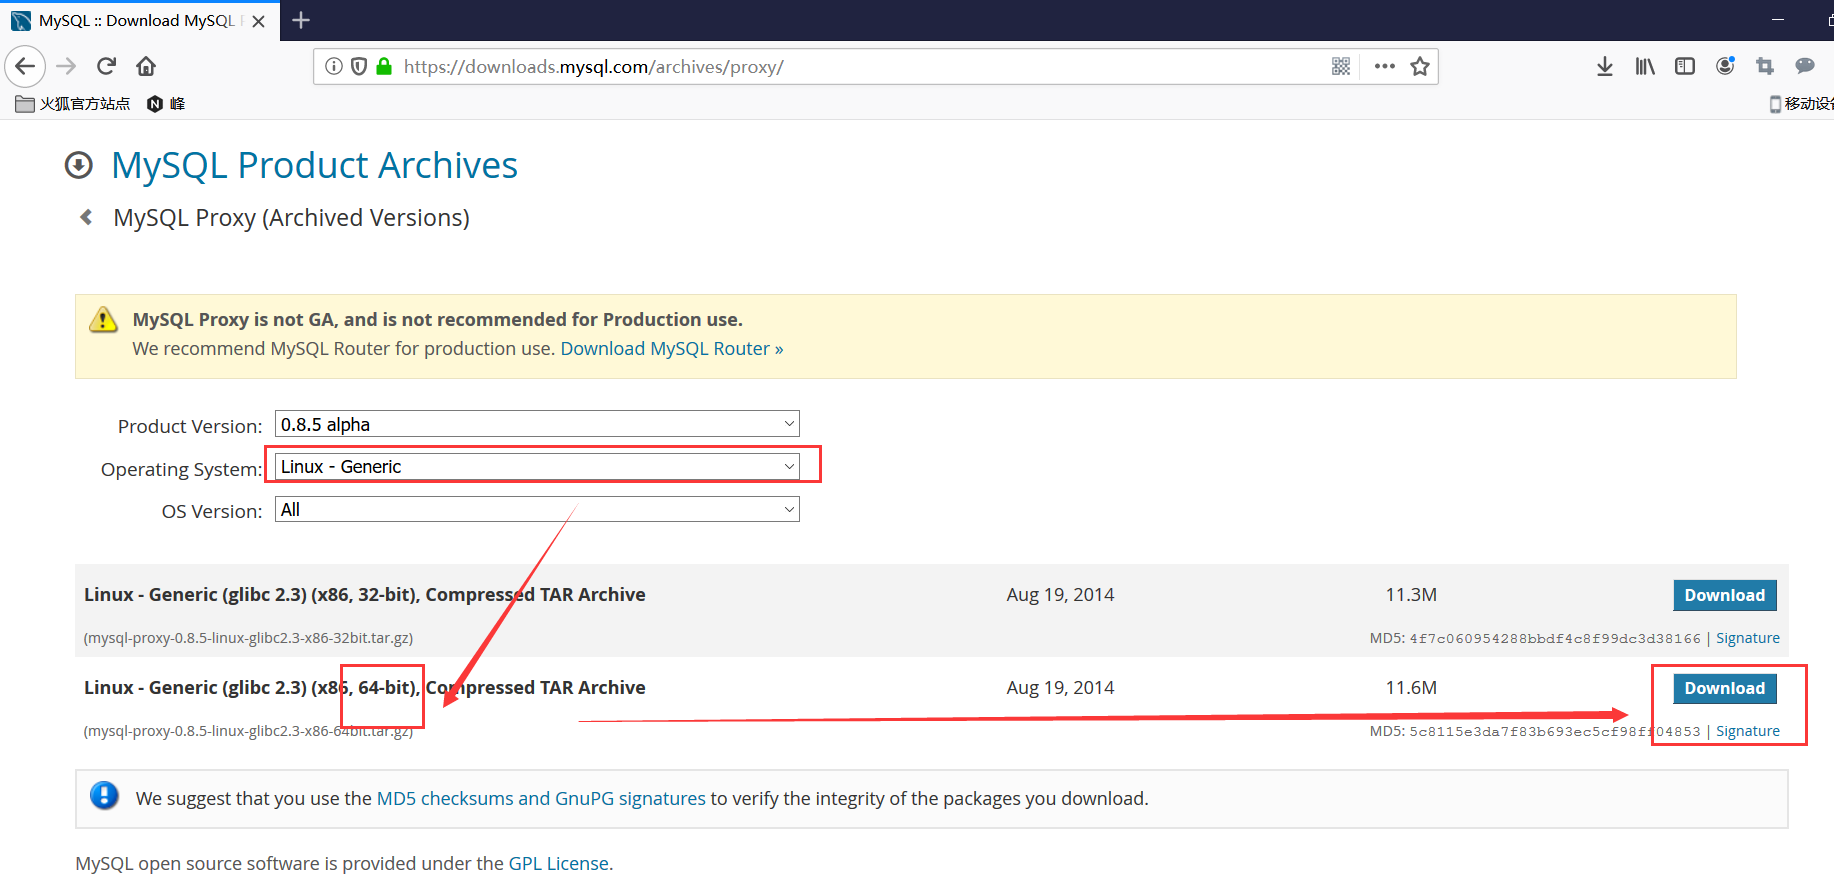
2)点击Download Archives
3)点击Mysql_Proxy

4)选择最新版本,对应通用的Linux-Generic操作系统,选择适合你的linux系统的包下载,例如我的虚拟机是64位的,就下载64位的。
2、配置proxy服务器
1)安装lua,新建代理用户
1 | [root@proxy ~]# yum install lua -y |
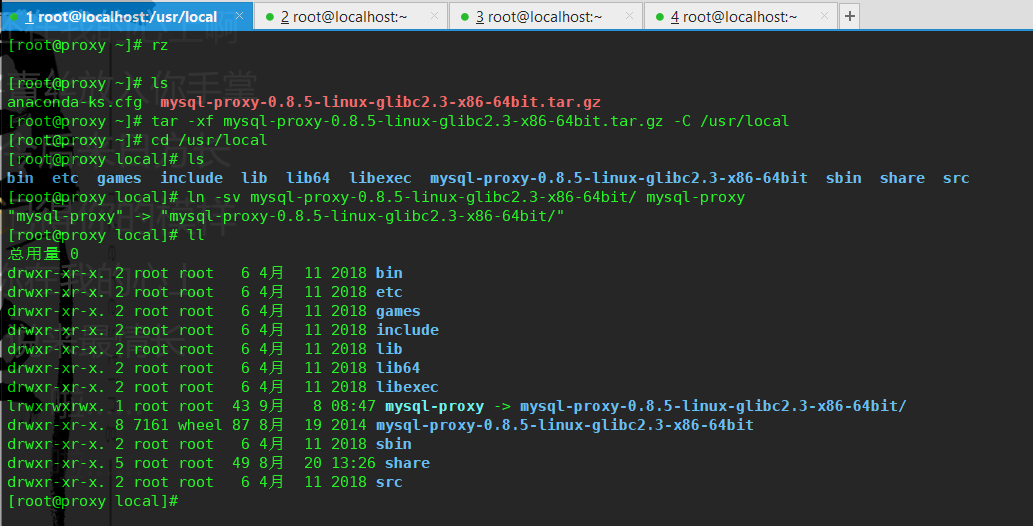
2)安装lrzsz,将刚刚下载好的mysql_proxy压缩包上传到proxy服务器
1 | [root@proxy ~]# rz |
如下图
3、了解mysql_proxy
1 | [root@proxy local]# cd mysql-proxy |
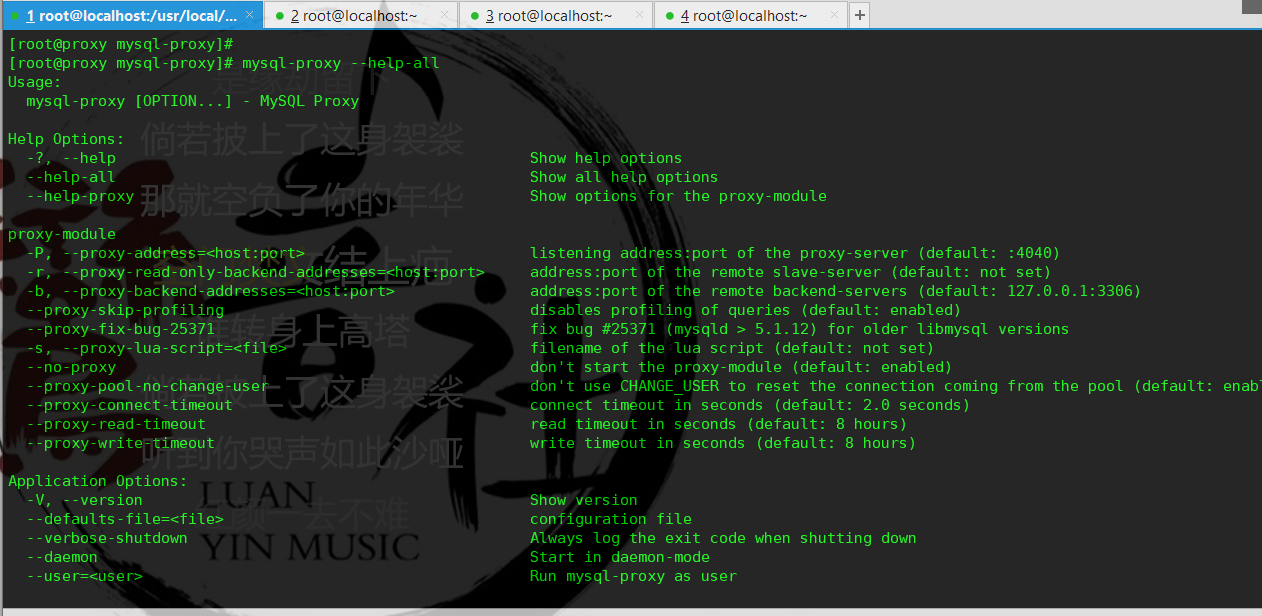
注意:查找帮助加–help-all即可
1 | [root@proxy mysql-proxy]# mysql-proxy --help-all |
注意:若正在64位linux系统装了32位的mysql_proxy,运行mysql-proxy –help-all命令会出错,如下:
1 | [root@proxy mysql-proxy]# mysql-proxy --help-all |
参数解释
1 | [root@proxy mysql-proxy]# mysql-proxy --help-all |
关于插件
1 | [root@proxy mysql-proxy]# ll lib/mysql-proxy/plugins/ |
其中有一个libadmin.so管理接口比较常用,可以看看当前后端有几个服务器,这些服务器在何种状态等。使用这个管理接口:–plugins=admin
4、搭建主从复制后端架构
1 | #节点 |
初始配置
slave1、slave2、master上执行以下命令
1 | yum -y install mariadb mariadb-server |
master
1 | [root@master ~]# vim /etc/my.cnf |
slave1
1 | [root@slave1 ~]# vim /etc/my.cnf |
slave2
1 | [root@slave2 ~]# vim /etc/my.cnf |
两个slave的结果均如下图:
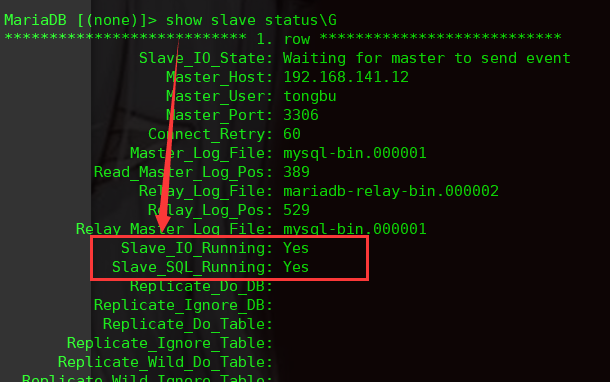
验证结果
master
1 | MariaDB [(none)]> create database test charset=utf8; |
slave1、slave2上查看数据是否同步
1 | MariaDB [(none)]> use test; |
5、在proxy上启动mysql-proxy
1)先回顾一下各个节点ip
1 | slave1:192.168.141.53/24 |
2)编辑配置文件
1 | [root@proxy mysql-proxy]# vim /usr/local/mysql-proxy/conf/mysql-proxy.conf |
3)提升配置文件的权限,修改lua脚本(:set nu查看行号,编辑第40、41行)
注意:rw-splitting.lua是指读写分离脚本
1 | [root@proxy mysql-proxy]# chmod 660 conf/mysql-proxy.conf |
上述命令修改了两个参数,最小连接数和最大连接数,修改后,mysql-proxy的调度机制就变成了,如果连接的客户端,超过两台,就会执行读写分离策略。
4)启动mysql-proxy(如果无法正常启动,根据报错修改配置文件)
1 | [root@proxy mysql-proxy]# mysql-proxy --defaults-file=/usr/local/mysql-proxy/conf/mysql-proxy.conf |

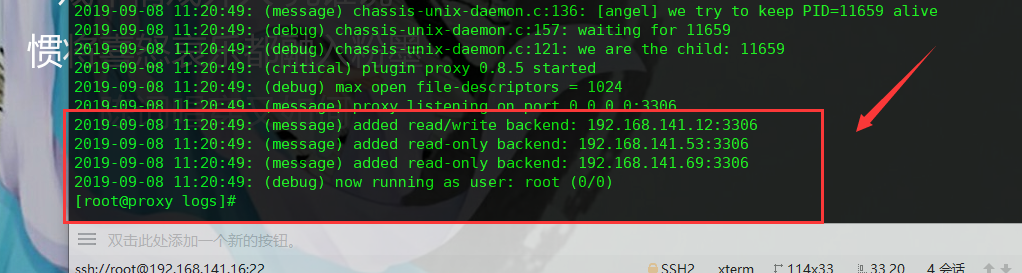
可以看到mysql-proxy启动成功。
可以通过查看日志来确定mysql-proxy启动是否成功,以及后端服务器是否加入成功。
1 | [root@proxy logs]# pwd |
6、在master上进行数据库授权
1 | MariaDB [(none)]> use mysql; |
7、测试
1)在proxy放行3306端口
1 | [root@proxy logs]# firewall-cmd --permanent --add-port=3306/tcp |
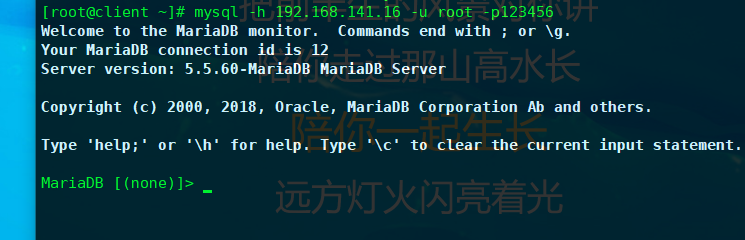
2)在client连接proxy的数据库
1 | [root@client ~]# yum install mariadb -y |
3)在proxy查看连接
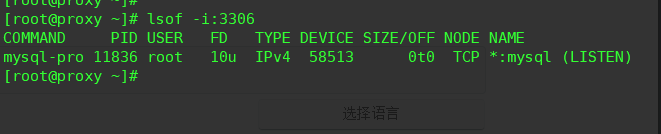
1 | [root@proxy ~]# yum install lsof -y |
如下图,数据指向是proxy->192.168.141.12,也就是由代理服务器指向了master。因此,在client连接proxy的数据库时,事实上连接到的是master的数据库。

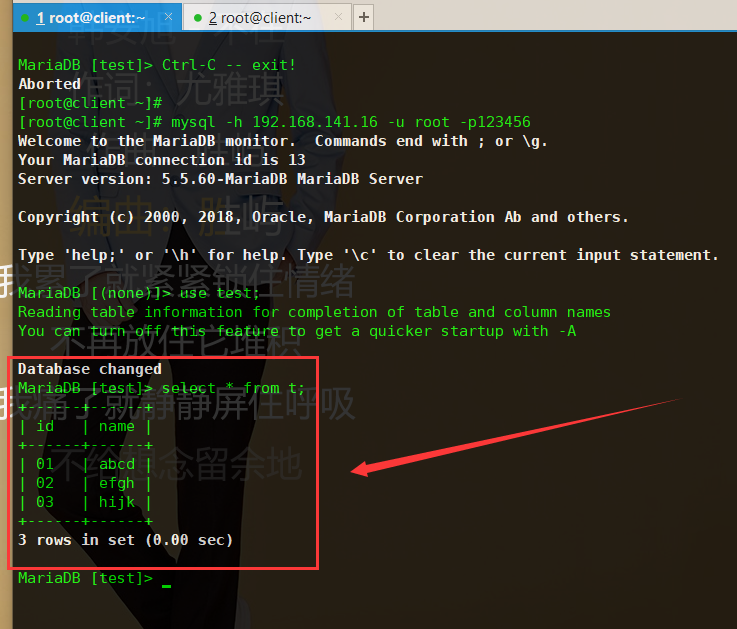
4)在client验证,可以看到主数据库master上,我们刚刚建的表格t和插入的相关数据。
1 | MariaDB [(none)]> use test; |
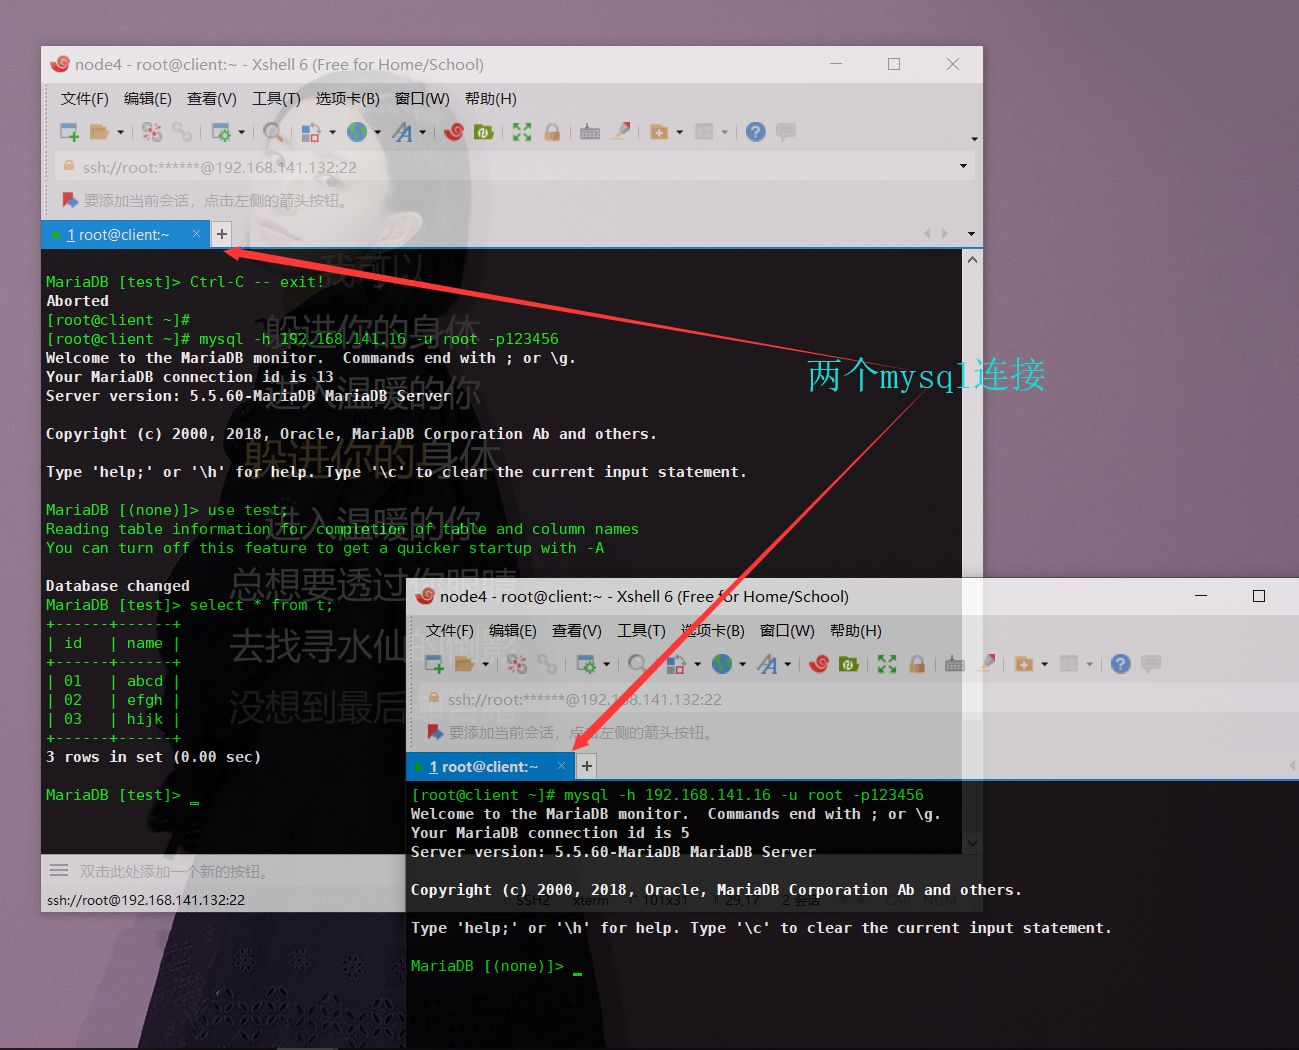
5)再开一个窗口,在client上建立第二个连接
1 | [root@client ~]# mysql -h 192.168.141.16 -u root -p123456 |
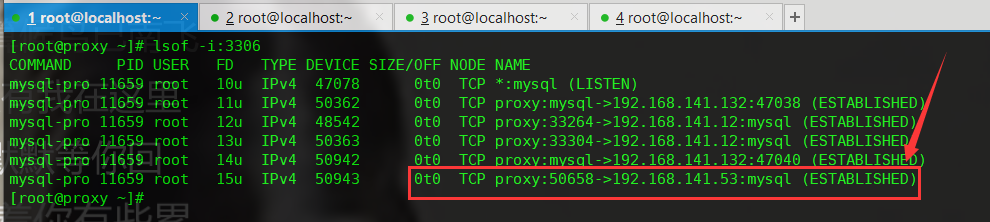
6)在proxy查看连接
1 | [root@proxy ~]# lsof -i:3306 |
如下图,此时由于在client上开了两个连接,因此除了proxy->master外,连接指向多了一个proxy->slave1。
7)再开一个窗口,在client上建立第三个连接
1 | [root@client ~]# mysql -h 192.168.141.16 -u root -p123456 |
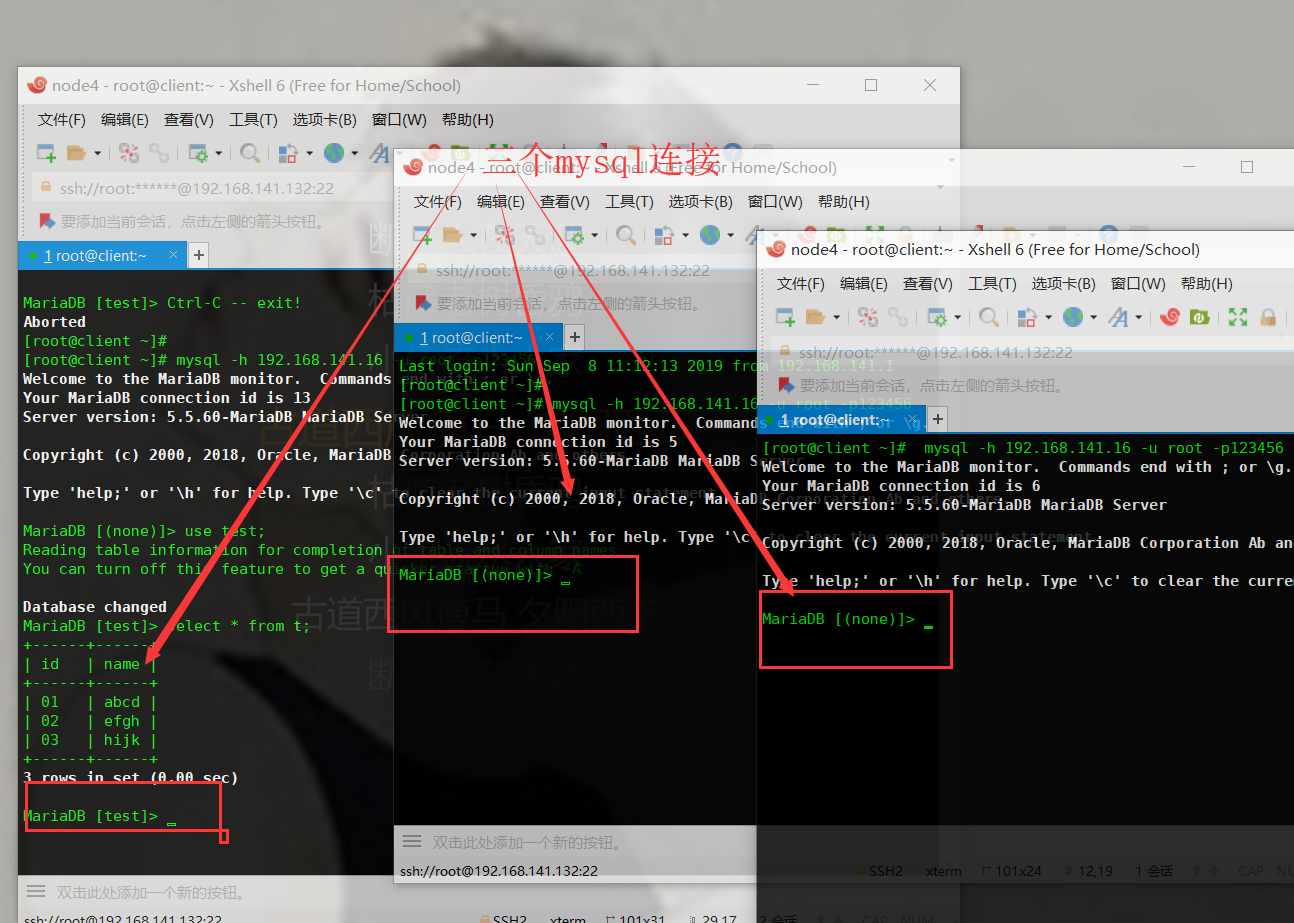
8)在proxy查看连接
1 | [root@proxy ~]# lsof -i:3306 |
如下图,没啥不同的,暂时忽略。
9)再开一个窗口,在client上建立第四个连接
1 | [root@client ~]# mysql -h 192.168.141.16 -u root -p123456 |
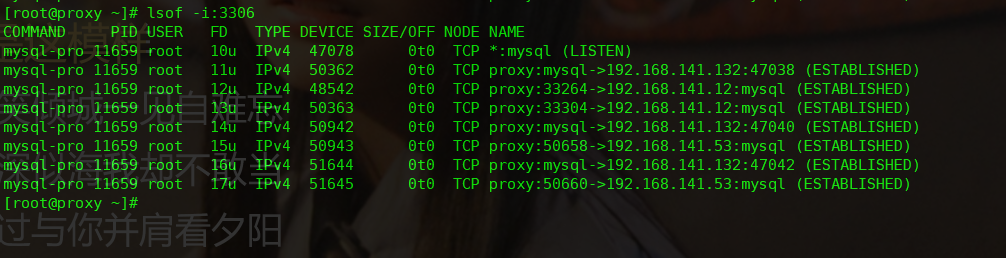
10)在proxy查看连接
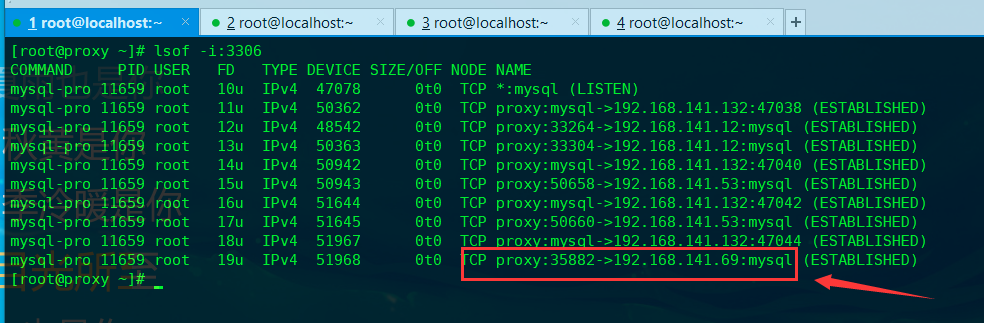
1 | [root@proxy ~]# lsof -i:3306 |
如下图,除了proxy->master、proxy->slave1外,连接指向多了一个proxy->slave2。
至此,master、slave1、slave2均用上了,一主多从模式配置成功。
验证读写分离
读写分离的验证,可以在slave1、slave2的数据库上分别插入不同的数据,由于主从同步是单向的,salve数据改变时,master仍然不变,我们可以利用这一特性来验证读写分离是否成功。
1)首先在master上清空原来的t表,salve1和slave2的t表也会同步被清空
master:
1 | [root@master ~]# mysql -u root -p |
slave1:
1 | MariaDB [test]> select * from t; |
slave2:
1 | MariaDB [test]> select * from t; |
2)接着在master、slave1、slave2上分别插入不同的语句。
1 | master: |
3)然后分别在master、slave1、slave2上分别查询表t内容。
1 | master: |
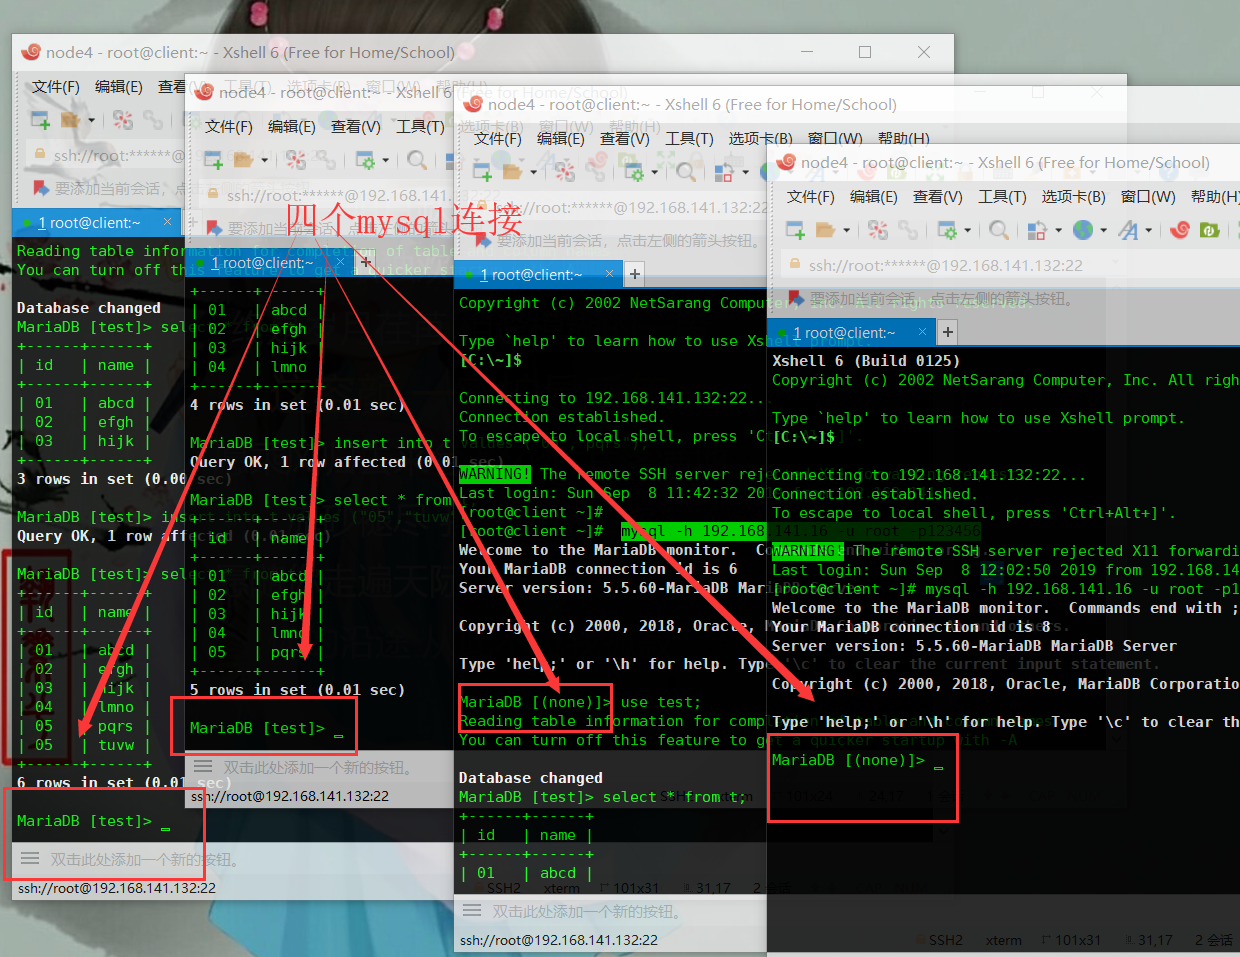
如上,可以看到master、slave1、slave2上t表的内容各有不同,我们在client之前打开的四个窗口上分别查询t表,结果如下:
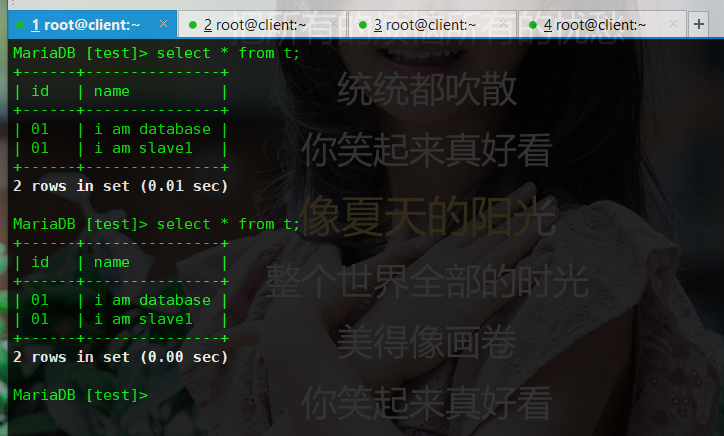
由上图可知,client查表,是从slave1上读取的数据,而非从master上读取的,否则就不会读取到“i am slave1”这一行内容了。
4)接下来在客户端插入一行数据
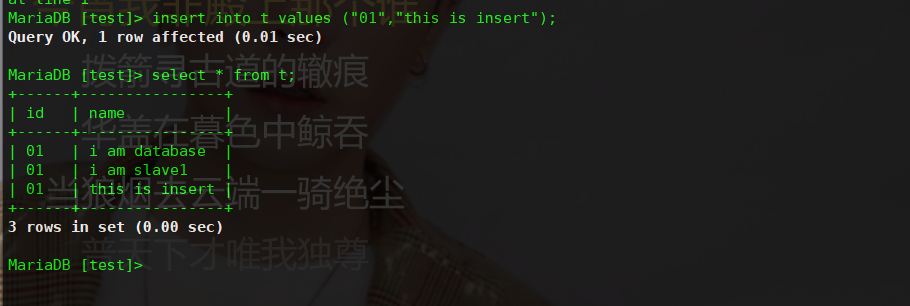
如上图,前一句是插入,后一句是读取。由“i am slave1”这一行内容我们可以判断出这次读取是从slave上读取的数据,那么新写入的“this is insert”究竟是写入到了slave1上,还是写入到master由slave1同步过来的呢?
结果如下图
master:
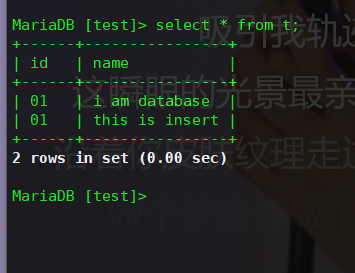
slave1:
slave2:
综合上面三图可知,“this is insert”这一行内容是插入到master之后,同步到两个slave的。因此,可以总结出,写操作是针对于master完成的,而读操作,是针对slave完成的,读写分离实现成功。
5)测试slave之间的切换功能
现在将slave1关机
然后在client上,查看表t的内容
如上图,可以看到之前client尚且还是读取slave1上的数据,此时已经读取到了slave2上的数据,说明slave之间可以正常切换。
附:重启mysql-proxy的方法
1 | [root@proxy logs]# netstat -tnlp |
如下图,可以看到mysql-proxy重启成功。

重启后,暂时尚未出现连接
1 | [root@proxy ~]# lsof -i:3306 |